Hello again and a very happy New Year and a new decade! Wishing you all a marvellously crafty 2020! As of yesterday our brand new Mini catalogue launched and along with it our annual sale-a-bration catalogue!
What is Sale-a-Bration?
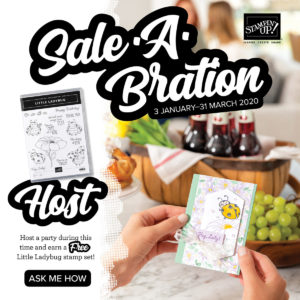
If you’re new to Stampin’ Up! you may well wonder what all the hype is with Sale-a-bration; well it’s definitely the most wonderful time of the year for Stampin’ Uppers! For every £45 you spend in my online store you get to select an exclusive gift for FREE! Yes you read that right for FREE!
The beautiful meercat card I posted the other day is one of the free stamp sets (The Gang’s All Meer); but it’s not only stamp sets you can redeem for free, there are embellishments, designer papers, card kits, punches, embossing folders, basically lots of choice to suit everyone.
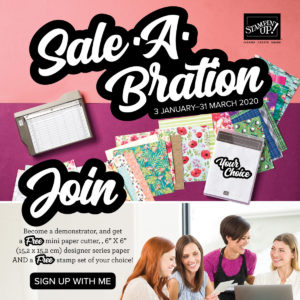
If that’s not enough and you want MORE every year during Sale-a-Bration Stampin’ Up! makes if fabulous joining offer even more fabulous! This year for only £99 you get to select £130 worth of products PLUS a new mini paper cutter PLUS a 6″x6″ designer series paper sampler PLUS your choice of ANY stamp set offered across all current publications! If that’s enough you also get FREE business supplies and FREE shipping! All in all I estimate this to be over £200 value for £99.
Anyway you can probably tell I’m a little over excited! Today I have another lovely card to show you featuring another set that is FREE during Sale-a-Bration.
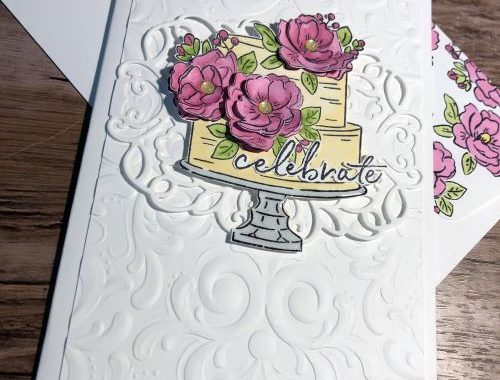
Happy Birthday to You
This gorgeous cling mount stamp set features five lovely stamps, the focal being a beautiful floral decorated cake. I’ll show you some photographs and then tell you a little about how I made it!
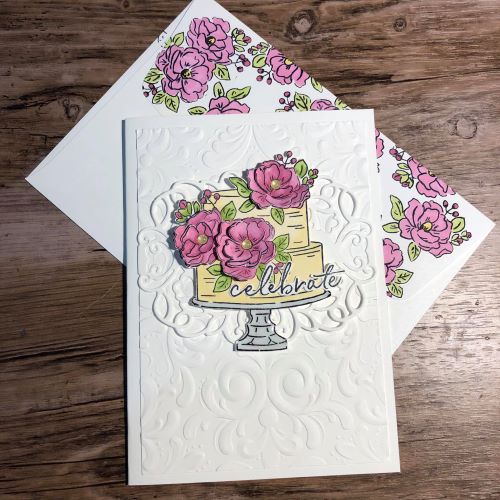
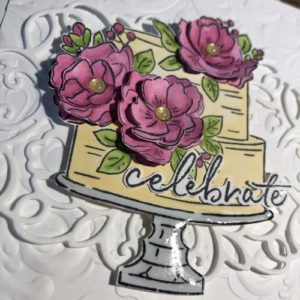
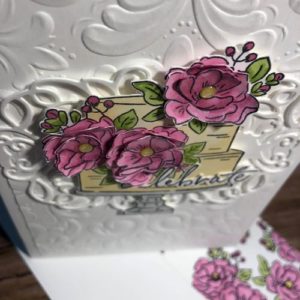
I started with a standard card base made from thick whisper white card stock. The embossed layer, also whisper white cardstock is embossed using the new Parisian embossing folder. I used the detailed bands dies to add some interest under the cake.
I stamped the cake image three times. One I coloured fully with the blends markers (colours listed below). The second I cut the full flowers out of, coloured them and using my fingers (or a bone folder) I curled them slightly before adhering to the main cake with tombow multi purpose adhesive. Using the third stamped imaged I cut out only the central area of the flowers, coloured and shaped them and then added them on top of the last layer. I finished each flower with a gold glitter enamel dot.
Using the fine tip glue pen I added a layer of dimension to the cake stand. Note this takes a while to dry so if you are after a card in a hurry skip this part. Finally I stamped the sentiment on whisper white and fussy cut it before layering onto my cake.
I then assembled the rest of my card, adding dimensionals to the back of my cake topper and there you have it!
Stampin’ Up! Products used
|
|
|
||
|
|
|||
|
|
|
|
|
|
|
|
|
|


")


I hope you enjoyed today’s project, if you’re visiting please leave me a comment to let me know you’ve dropped by!
If you would like to come along to one of my classes you would be more than welcome. They are currently twice weekly in Portaferry, Co. Down! All skill levels welcome! Next class is this Tuesday at 7.00 pm!
Have a fabulous weekend, until next time!
Gillian x
All images (c) Stampin’ Up!